
 OpenMV MicroPython
 CMUcam4 Graphical User Interface#
What the CMUcam4GUI is#
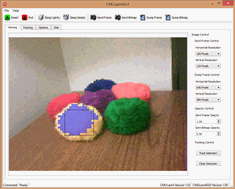
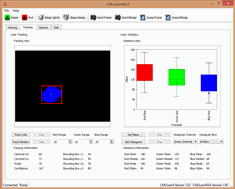
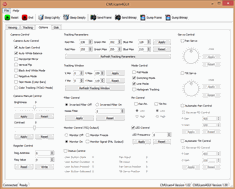
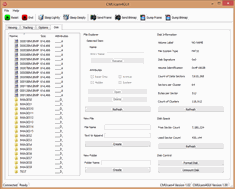
The CMUcam4GUI is a useful tool that makes working with the CMUcam4 easier. The CMUcam4GUI allows you to take pictures with your CMUcam4 and view them on your computer and use the pictures to compute the color tracking bounds of colored objects in the picture you want the CMUcam4 to track. Using the CMUcam4GUI you can quickly determine the color tracking bounds for an object in one lighting scene and widen the color tracking bounds to support tracking the object in changing lighting scenes. The CMUcam4GUI also allows you to see what the CMUcam4 is tracking in real time without a TV by displaying the contents of tracking, mean, histogram, and frame packets graphically that are sent by the CMUcam4. Additionally, the CMUcam4GUI allows you to play with all the CMUcam4 options in real time like controlling the pan and tilt servos, color tracking options, and low-level camera controls. Finally, the CMUcam4GUI allows you to manage the secure digital card attached to the CMUcam4 remotely through the CMUcam4.
Windows Setup#
Follow the steps below to setup the CMUcam4GUI for Windows:
Download the
CMUcam4GUI.zipfileUnzip it and extract the contents
Run the CMUcam4GUI.exe file
Linux Setup#
Follow the steps below to setup the CMUcam4GUI for Linux:
Add your user name to the dialout group
sudo adduser username dialout
Now verify by typing
groups username
Now log out and then log back in
Download the
CMUcam4GUI.zipfileUnzip it and extract the contents
Run the CMUcam4GUI.sh file
Macintosh Setup#
Follow the steps below to setup the CMUcam4GUI for Macintosh:
Install the Qt 1.2.1 SDK (Desktop 4.8.1) for Mac
Download the
CMUcam4GUI SourceOpen the CMUcam4GUI.pro file using QtCreator and switch to release mode from debug mode
Open the CMUcom4.h file and change the
#define CMUCOM4_FAST_BAUD_RATEto 115200 from 230400 (Mac’s can’t handle the 230400 BPS baud rate)Click run
Question: Why don’t you have a prebuilt MAC application?
Answer: Kwabena, the CMUcam4 developer, does not have a MAC…
CMUcam4GUI Manual#
The CMUcam4GUI is very intuitive and implements all the same functionality in the CMUcam4 Arduino Interface Library. This manual only exists to give an overview of the CMUcam4GUI and you should read the CMUcam4 Command List User Manual if you need more information about CMUcam4 commands. If you encounter errors trying to connect to the CMUcam4, unplug your USB to serial device from your computer and plug it back in again. Also, make sure your serial converter can handle 19200 BPS, 115200 BPS, and 230400 BPS. If you are using a FTDI chip based converter then you should be fine.
Menu Bar and Tool Bar commands
Tool Bar Commands
Begin/Reset - Connect to the CMUcam4
End - Disconnect from the CMUcam4
Sleep Lightly - Put the CMUcam4 into a very low power state
Sleep Deeply - Put the CMUcam4 into a ultra low power state
Send Frame - Take a color image and display it in the viewing window
Send Bitmap - Take a binary image and display it in the viewing window
This is an 80x60 binary image of whatever the CMUcam4 is tracking - the CMUcam4 must be tracking something for this to be useful
Dump Frame - Take a color image and save it to the SD card
Dump Bitmap - Take a binary image and save it to the SD card
This is an 80x60 binary image of whatever the CMUcam4 is tracking - the CMUcam4 must be tracking something for this to be useful
Menu Bar Commands
Save Frame - Save the color image in the viewing window to a file
Save Bitmap - Save the binary image in the viewing window to a file
This is an 80x60 binary image of whatever the CMUcam4 is tracking - the CMUcam4 must be tracking something for this to be useful
Clear Frame - Erase the color image in the viewing window
Clear Bitmap - Erase the binary image in the viewing window
This is an 80x60 binary image of whatever the CMUcam4 is tracking - the CMUcam4 must be tracking something for this to be useful
Open - Open a color image to use with the track selection feature
Exit - Exit the application
Viewing Tab
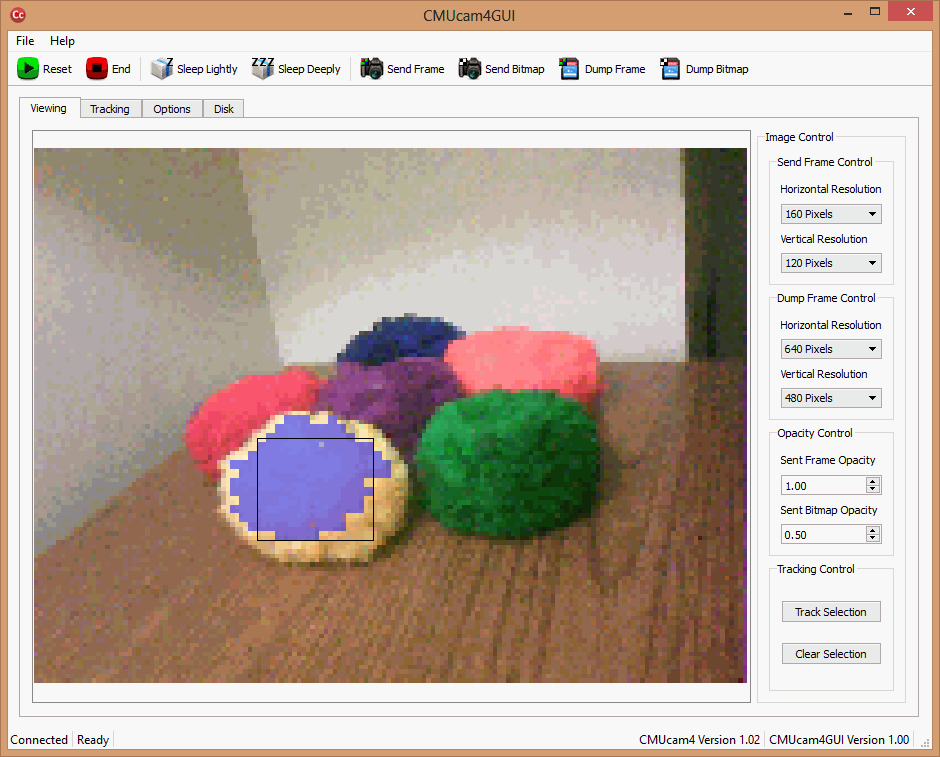
Send Frame Control - Select the horizontal and vertical resolution for the send frame button in the tool bar
You cannot move whatever you are taking a picture of while the send frame command is running
If the image quality looks bad then turn off auto-gain and auto-white balance and make sure the CMUcam4 is looking at an illuminated object
Use a smaller resolution to capture the image quicker - like 160x120
Dump Frame Control - Select the horizontal and vertical resolution for the dump frame button in the tool bar
You cannot move whatever you are taking a picture of while the dump frame command is running
If the image quality looks bad then turn off auto-gain and auto-white balance and make sure the CMUcam4 is looking at an illuminated object
Use a smaller resolution to capture the image quicker - like 160x120
Opacity Control - Select the sent frame and sent bitmap opacity - between 1.00 for 100% and 0.00 for 0%
Tracking Control - Select a color blob in the viewing window to track
The selection rectangle should only enclose the pixels within the color blob you want to track
After selecting the color blob click the track color button to compute the color bounds to track that color blob
The algorithm works by computing the mean and standard deviation of the red, green, and blue color channels inside of the selection rectangle
The Confidence Interval Level Coefficient selects how much of the standard deviation to add +/- to the means of the red, green, and blue color channels - between 0 for +/- (stdev * 1) to 99 for +/- (stdev * 10)
Tracking Tab
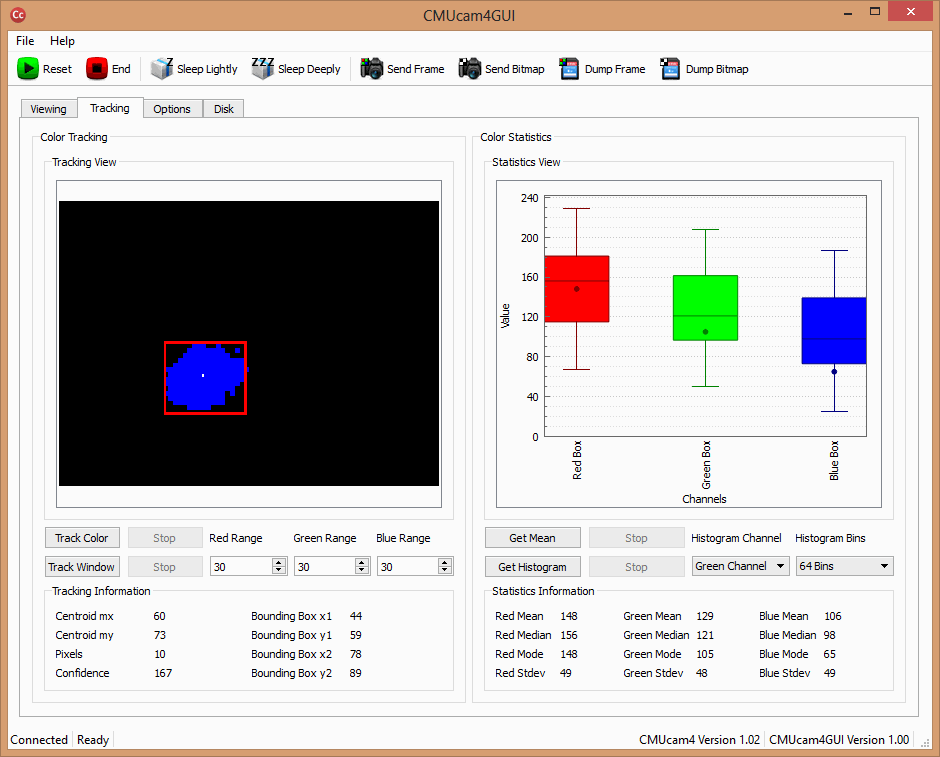
Enable Line mode in the options panel to see the blue tracked pixels.
Options Tab
Disk Tab
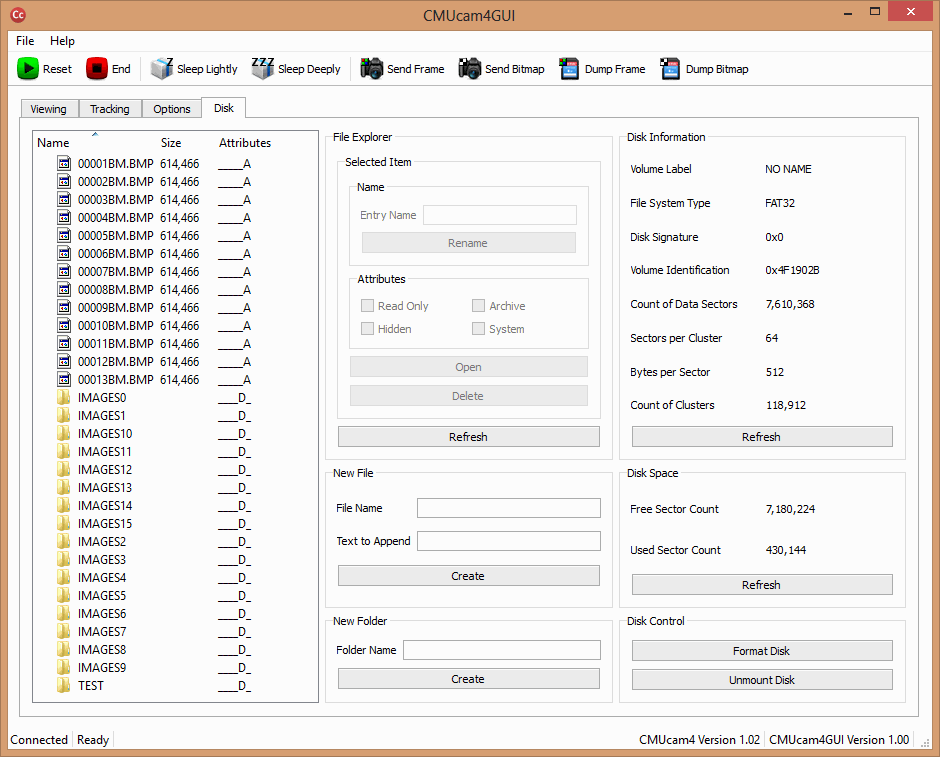
Disk Information - Get information about the geometry of the disk
Disk Space - Get information about the space on the disk
Disk Control - Unmount/format the disk
Note: You should unmount the disk after using any SD card related command before closing the graphical user interface
Note: Clicking the format disk button will immediately format the disk
New File - Make a new file with some text or append some text to a file
New Folder - Make a new folder
File Explorer - Interact with the files/folders on the SD card from your computer
Click refresh to list the contents of the current directory
Change a file’s or a folder’s attributes by clicking on the attributes check boxes
Double click on a folder to enter it
Double click on a file to open it
Do not try to open files larger than about 10 KB (unless you feel like waiting forever) because the file transfer is very slow at around 4 KBs
You can move files and folders by renaming them with a new path e.g. rename
txt.txtto../txt.txt
How to bound colors#
Go to options
Turn YUV on
Wait 5 seconds
Turn autogain and autowhite balance off
Select send frame horizontal resolution and set that to 160
Select send frame vertical resolution and set that to 120
Point the CMUcam4 at the object you want to track, then without moving the CMUcam4 or the object and both most not be moving click send frame
Wait until the frame is sent to the GUI, don’t move the object
Select the area of color of the object (and nothing outside that area)
Click track selection
Click okay with 50 as the default value
If just the object has blue drawn on it click track selection again and make the 50 equal to 60
Repeat the above until you push the track selection value as high as possible, you can stop when its 99. If you start bounding unwanted things then you are done too.
Then go over to options… make the green min value 0 and the green max value 255 (this sets Ymin to 0 and Ymax to 255). If you start bounding unwanted things then try less wide bounds until you are just bounding the object you want. You can refresh what is bounded by clicking the sendBitmap button.
And… then you should have your six tracking options… Additionally, you can also widen the (V/red) and (U/blue) bounds manually too if you want. This will help make the system more robust in different lighting conditions and such.
To see what the CMUcam4 sees….
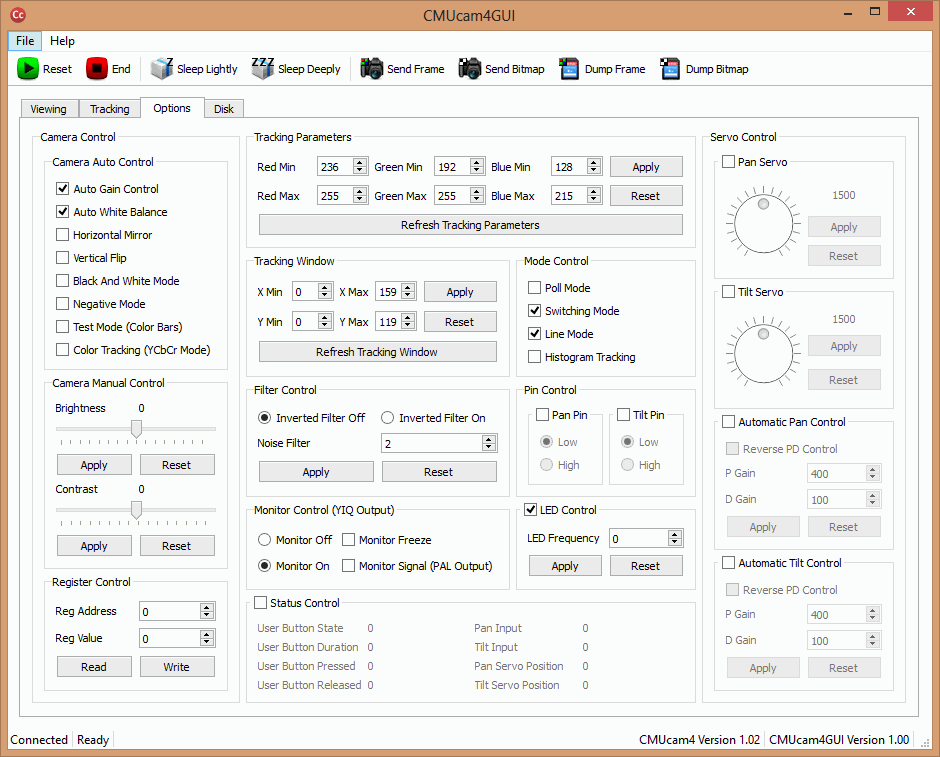
Turn line mode on (there’s a check box in options)
Then go to viewing and click track color.
CMUcam4GUI Source#
Click here to download the source code for the CMUcam4GUI.
You will need the Qt 1.2.1 SDK (Desktop 4.8.1) to compile the code.