13.1.6. The frame buffer viewer
The frame buffer viewer shows what the camera sees – more precisely, whatever the running script last left in the camera’s frame buffer. Every snapshot() puts a fresh capture there, and everything the script draws on the image afterwards is there too, so the preview shows the frame after the script’s processing, annotations included. The IDE polls the camera for the latest frame over USB and displays each one as it arrives.
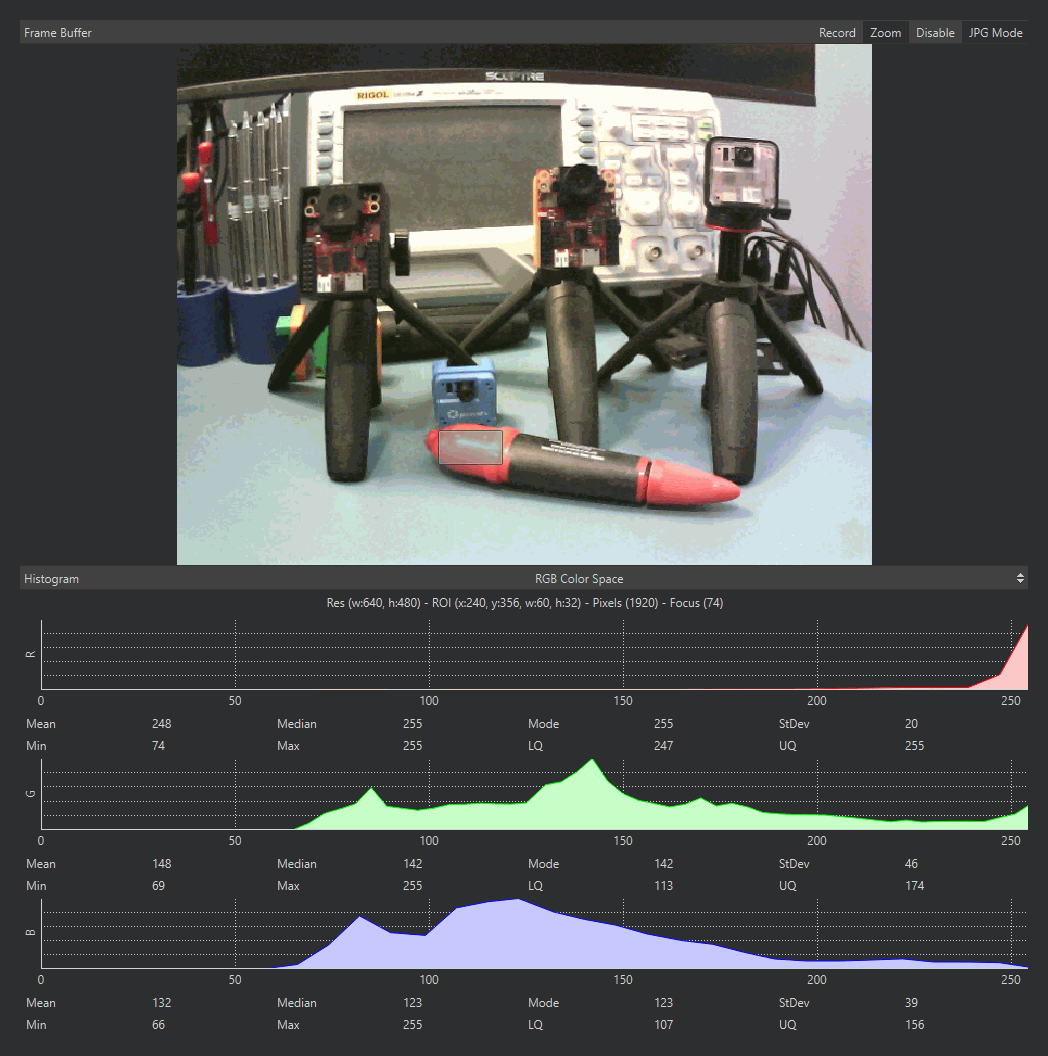
The frame buffer with a region selected: the readout line and the histogram below it compute from the selected pixels only.
The preview costs something: compressing and streaming each frame takes camera time, so a script generally runs faster with the IDE disconnected than with the preview live. The pane’s title-bar buttons manage that trade-off:
Zoom – scale the image to fit the pane (on by default). Off, the image renders at one screen pixel per image pixel.
Disable – stop streaming frames entirely, for maximum camera-side performance. The script keeps running; the preview freezes on the last frame behind a “Frame Buffer Disabled” banner until you re-enable it. Use it when benchmarking, since the FPS the script achieves with the preview disabled is the FPS it will achieve standalone.
JPG Mode / RAW Mode – whether frames are JPEG compressed for the trip to the IDE or sent uncompressed. The mode starts out at whichever the connected camera prefers – JPG for most. JPG mode is much faster; RAW mode shows the exact pixel values at the cost of frame rate. The button appears for cameras running recent firmware.
13.1.6.1. Selecting a region
Click and drag on the image to select a rectangular region. While a selection exists, the histogram below computes its statistics from the selected pixels only, and the readout line above the histogram reports the selection’s position, size, and pixel count – the quickest way to read off an ROI tuple for a script, or to measure the colour statistics of one object instead of the whole scene. Click without dragging to read off a single pixel’s position; click outside the image to clear the selection.
13.1.6.2. Saving what the camera sees
Right-click the image to save the displayed frame to an image file on your computer. The save respects the selection: right-click inside a selected region and just that region is saved (the menu entry reads “Save Image selection to PC”); right-click anywhere else and the whole frame is saved. What lands on disk is the frame shown at the moment you right-click – to capture one exact frame from a moving scene, stop the script first so the preview freezes on it.