
 OpenMV MicroPython
Multispectral Event Camera
The Multispectral Event Camera Module pairs the GENX320 event sensor with a 1 MP PAG7936 global-shutter colour sensor on a single module — a synchronised event + colour pipeline for high-speed object tracking, LED tracking, fluid flow, and other dynamic scenes.
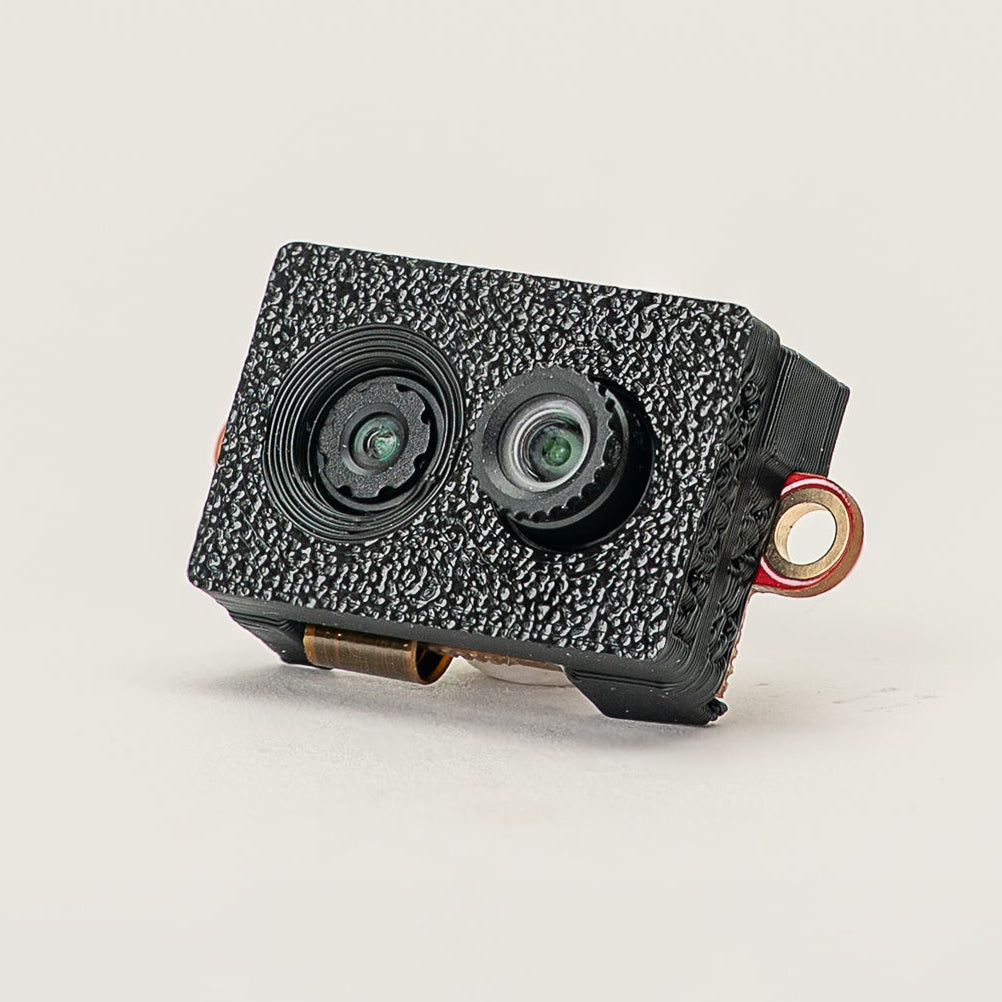
For full datasheet, photos, and ordering see the Multispectral Event Camera product page.
Note
Supported on the OpenMV N6 only.
Highlights
320x320 event sensor, >140 dB dynamic range, 375 Hz+ histograms
PAG7936 colour: 1280x800 @ 120 FPS, 640x400 @ 240 FPS
Synchronised event timestamps with shared exposure trigger
Sees below 5 lux without auto-exposure
Power starts at ~3 mW for event streaming
Targeted at high-speed tracking, LED tracking, and fluid/particle flow
Usage
The colour sensor and the GENX320 event sensor each get their own
csi.CSI instance. The first call defaults to the primary sensor
(the PAG7936); the second binds to the GENX320 by passing
cid= csi.GENX320. Hard-reset the colour sensor with
csi.CSI.reset (hard=True) to bring the rail up, and
configure the GENX320 with hard=False so its driver only
reprograms the chip without re-toggling reset.
The GENX320 outputs 320x320 in histogram mode; the PAG7936 at
csi.QVGA outputs 320x200. The basic overlay below clips the
bottom 120 rows of the GENX320 frame. Use the homography
transform (below) for a fitted overlay or a larger PAG7936
framesize.
Two scratch buffers stay constant across the frame loop — a 256x1
alpha palette stored as an image.Image so histogram pixels at
the mid-gray baseline (128) become transparent and both
ON-event highlights and OFF-event shadows become opaque, and a
GENX320 frame buffer pre-allocated with image.Image so
csi.CSI.snapshot (blocking=False, image=...) can fill it
in place each iteration without reallocating:
import time
import csi
import image
import math

# V-shaped alpha: pixels far from the baseline 128 become opaque.
alpha_pal = image.Image(256, 1, image.GRAYSCALE)
for i in range(256):
    alpha_pal[i] = int(math.pow(abs(i - 128) / 128.0, 2) * 255)

# Setup the color camera sensor.
csi0 = csi.CSI()
csi0.reset(hard=True)  # force hardware reset.
csi0.pixformat(csi.RGB565)
csi0.framesize(csi.QVGA)

csi1 = csi.CSI(cid=csi.GENX320)
csi1.reset(hard=False)  # no hardware reset - just configure GENX320
csi1.pixformat(csi.GRAYSCALE)
csi1.framesize((320, 320))
csi1.brightness(128)  # histogram baseline (default)
csi1.contrast(64)     # per-event step

clock = time.clock()

img1 = image.Image(csi1.width(), csi1.height(), csi1.pixformat())

while True:
    clock.tick()
    img0 = csi0.snapshot()
    csi1.snapshot(blocking=False, image=img1)
    img0.draw_image(img1, 0, 0, color_palette=image.PALETTE_EVT_LIGHT,
                    alpha_palette=alpha_pal,
                    hint=image.BILINEAR)
    print(clock.fps())
Each iteration takes a blocking colour snapshot and a non-blocking
GENX320 snapshot. Image.draw_image then composites the two:
color_palette= image.PALETTE_EVT_LIGHT (or
image.PALETTE_EVT_DARK for a dark background) maps the
GENX320’s grayscale histogram into a colour ramp, alpha_palette=
blends each pixel using the v-shaped alpha map so quiet regions
of the scene fall through to the colour image, and hint=
image.BILINEAR smooths the upscale when the colour sensor runs
at a higher resolution than the GENX320.
The GENX320’s bias presets, AFK filter, hot-pixel calibration,
and STC filter ioctls all work the same way in this dual-camera
setup — call them on csi1 after csi.CSI.reset. See the
sections below for details.
GPU-accelerated alignment
Image.draw_image accepts a transform= argument — a 3x3
homography matrix as a 2-D ulab.numpy array. On the OpenMV N6
the GPU runs the per-pixel projection during the same draw, so
the GENX320 frame can be re-aligned against the colour camera’s
perspective without a separate warp pass — useful when the two
sensors have slightly different optics or fields of view, or
when the colour camera runs at a higher resolution. Calibrate
the matrix per camera with the
GenX320 Overlay Calibration tool,
which displays a flickering checkerboard so the event sensor
produces corner events without any physical movement:
import time
import csi
import image
from ulab import numpy as np
import math

# Calibration matrix from the GenX320 Overlay Calibration tool.
m = np.array([
    [2.000000, 0.000000,   0.000000],
    [0.000000, 2.000000,  80.000000],
    [0.000000, 0.000000,   1.000000],
])

alpha_pal = image.Image(256, 1, image.GRAYSCALE)
for i in range(256):
    alpha_pal[i] = int(math.pow(abs(i - 128) / 128.0, 2) * 255)

# Setup the color camera sensor.
csi0 = csi.CSI()
csi0.reset(hard=True)
csi0.pixformat(csi.RGB565)
csi0.framesize(csi.VGA)

csi1 = csi.CSI(cid=csi.GENX320)
csi1.reset(hard=False)
csi1.pixformat(csi.GRAYSCALE)
csi1.framesize((320, 320))
csi1.brightness(128)
csi1.contrast(64)

clock = time.clock()

img1 = image.Image(csi1.width(), csi1.height(), csi1.pixformat())

while True:
    clock.tick()
    img0 = csi0.snapshot()
    csi1.snapshot(blocking=False, image=img1)
    img0.draw_image(img1, 0, 0, color_palette=image.PALETTE_EVT_LIGHT,
                    alpha_palette=alpha_pal,
                    hint=image.BILINEAR,
                    transform=m)
    print(clock.fps())
This variant runs the colour camera at csi.VGA (640x480) and
the GENX320 at its native 320x320 — the homography projects the
smaller GENX320 frame into the larger colour frame as part of
the draw, so the upscale factor is baked into the matrix itself
rather than applied separately.
Event camera details
The GENX320 is an event-based vision sensor — instead of reading out the whole 320x320 array on a fixed frame clock, each pixel reports asynchronous “events” the instant it detects a brightness change. Every event carries an X/Y coordinate, an ON/OFF polarity (bright→dark or dark→bright), and a microsecond timestamp. That’s where the sensor’s microsecond temporal precision, lack of motion blur, very high dynamic range, and activity-scaled power draw come from. Static scenes generate no data.
The OpenMV firmware exposes the GENX320 through csi.CSI with
cid= csi.GENX320. Two operating modes are available:
Histogram mode (default) — events are accumulated on-chip into per-pixel bins and reported as a 320x320 grayscale frame at a configurable rate (~20-350 FPS). The sensor behaves like a regular camera, so all of the standard image-processing routines (
Image.find_blobs, palettes, etc.) work directly.Event mode — raw events stream into a numpy
ndarraywith full microsecond timestamps, for applications that need the temporal detail rather than a pre-binned frame.
Histogram mode
In histogram mode the GENX320 outputs grayscale frames where each pixel encodes the recent event activity at that location. Pixels above the brightness baseline are ON events (brightness rising), below are OFF events (brightness falling). The default baseline brightness is 128 and the per-event contrast step is 16 — bump the contrast up to make events pop:
import csi
import time

csi0 = csi.CSI(cid=csi.GENX320)
csi0.reset()
csi0.pixformat(csi.GRAYSCALE)
csi0.framesize((320, 320))
csi0.brightness(128)  # baseline (default 128)
csi0.contrast(16)     # per-event step
csi0.framerate(50)    # 20-350 FPS

clock = time.clock()
while True:
    clock.tick()
    img = csi0.snapshot()
    print(clock.fps())
csi.CSI.brightness, csi.CSI.contrast, and csi.CSI.framerate
are the three knobs that shape the histogram output.
Colorized output
Set csi.CSI.color_palette to image.PALETTE_EVT_LIGHT for a
light background or image.PALETTE_EVT_DARK for a dark one — the
driver emits RGB565 frames using the palette directly:
csi0.color_palette(image.PALETTE_EVT_LIGHT)
Hot-pixel calibration
Event sensors accumulate “hot pixels” that fire spuriously. Run
csi.IOCTL_GENX320_CALIBRATE against a static scene to disable
them. The driver builds a 320x320 per-pixel hit count, computes
the mean and standard deviation, and disables any pixel whose
count is above mean + sigma * stddev — then the disabled
pixels stop emitting events at the sensor level.
Two parameters control the calibration:
event_count— how many events to tally before computing statistics. The loop captures frames until the running event total crosses this budget. Higher counts give a more reliable estimate at the cost of longer calibration time.10000is a reasonable starting point.sigma— threshold multiplier on the standard deviation. Lower values are more aggressive (more pixels disabled); higher values are more conservative.0.5is a good default.
Aim the sensor at a static scene first so any motion-driven events don’t get counted against pixels that are actually fine:
csi0.snapshot(time=5000)  # let the user steady the camera
disabled = csi0.ioctl(csi.IOCTL_GENX320_CALIBRATE, 10000, 0.5)
print(f"disabled {disabled} hot pixels")
Anti-flicker (AFK) filter
Periodic light sources (fluorescent, LED-driven displays) generate
huge volumes of redundant events. The AFK filter rejects events
whose pixel toggles at a frequency inside a band — enable it via
csi.IOCTL_GENX320_SET_AFK with the band edges in hertz:
csi0.ioctl(csi.IOCTL_GENX320_SET_AFK, 1, 130, 160)  # 130-160 Hz
csi0.ioctl(csi.IOCTL_GENX320_SET_AFK, 0)            # disable
Bias presets
Each pixel in the GenX320 runs an analog front-end with several configurable biases. They jointly govern sensitivity, noise, pixel bandwidth, and event rate — the right combination depends on the scene. The individual biases are:
DIFF_ON — the positive comparator contrast threshold. A pixel emits an ON event when its log-illumination has risen by this much. Lower = more sensitive to bright transitions.
DIFF_OFF — the negative comparator contrast threshold (the symmetric counterpart for OFF events). Lower = more sensitive to dark transitions.
FO — the pixel’s low-pass cut-off frequency. Higher = wider pixel bandwidth (faster response, lower latency) but more background-noise activity.
HPF — the high-pass cut-off frequency. Higher = stronger rejection of slow brightness changes; only fast transitions reach the comparators. Useful for ignoring ambient drift.
REFR — the refractory period. After a pixel fires, it stays in reset for this long before it can fire again. Higher = longer dead time, useful for capping the per-pixel event rate.
After csi.CSI.reset the driver applies
csi.GENX320_BIASES_LOW_NOISE, not csi.GENX320_BIASES_DEFAULT
— the datasheet defaults emit a much higher background event
rate, so LOW_NOISE is used as the starting point to keep the
stream quiet. Call csi.IOCTL_GENX320_SET_BIASES with a different
preset when the application needs more sensitivity or bandwidth.
csi.IOCTL_GENX320_SET_BIASES applies one of five presets:
csi.GENX320_BIASES_DEFAULT— GenX320 datasheet defaults. Balanced sensitivity, noise, and bandwidth for general scenes.csi.GENX320_BIASES_LOW_LIGHT— both contrast thresholds loosened for higher sensitivity, FO lowered to keep noise down, and HPF set to 0 so slow brightness changes still register — a low-light scene generates few events on its own, so we want as many as possible to come through.csi.GENX320_BIASES_ACTIVE_MARKER— tuned for tracking high-contrast blinking LEDs. Contrast thresholds raised so only sharp transitions trigger; FO and HPF cranked high to maximize pixel bandwidth and reject any slow ambient drift; REFR pulled to 0 so every blink edge is captured back-to-back. The result: a stream that’s almost all LED edges, easy to track.csi.GENX320_BIASES_LOW_NOISE— driver default. Both contrast thresholds raised vs.DEFAULT(less sensitive) and FO lowered (slower pixel = quieter pixel). Best for static or slow scenes where false events would otherwise dominate.csi.GENX320_BIASES_HIGH_SPEED— FO bumped up so each pixel can respond faster, HPF raised to reject slow brightness drift, and REFR raised so a single fast-moving edge doesn’t flood the readout — the longer dead time keeps the event volume bounded under heavy motion.
Override individual biases with csi.IOCTL_GENX320_SET_BIAS plus
one of csi.GENX320_BIAS_DIFF_ON, csi.GENX320_BIAS_DIFF_OFF,
csi.GENX320_BIAS_FO, csi.GENX320_BIAS_HPF, or
csi.GENX320_BIAS_REFR and a DAC value. Each bias is set
independently — pick a preset as a starting point, then tweak
whichever biases your scene needs:
csi0.ioctl(csi.IOCTL_GENX320_SET_BIASES, csi.GENX320_BIASES_LOW_LIGHT)
csi0.ioctl(csi.IOCTL_GENX320_SET_BIAS, csi.GENX320_BIAS_HPF, 20)
Tracking
Because histogram-mode output is just a grayscale image, regular blob tracking works directly. To track an active-marker LED, load the active-marker bias preset and find blobs at the bright end of the histogram:
import csi
import time

csi0 = csi.CSI(cid=csi.GENX320)
csi0.reset()
csi0.pixformat(csi.GRAYSCALE)
csi0.framesize((320, 320))
csi0.brightness(128)
csi0.contrast(16)
csi0.framerate(200)
csi0.ioctl(csi.IOCTL_GENX320_SET_BIASES, csi.GENX320_BIASES_ACTIVE_MARKER)

clock = time.clock()
while True:
    clock.tick()
    img = csi0.snapshot()
    for blob in img.find_blobs([(120, 140)], invert=True,
                               pixels_threshold=2, area_threshold=4,
                               merge=True):
        img.draw_detection(blob)
    print(clock.fps())
Event mode
Event mode bypasses the on-chip histogram and streams raw events
into a numpy ndarray. Each event is a row of six uint16
columns:
[0]event type — see below[1]seconds timestamp[2]milliseconds timestamp[3]microseconds timestamp[4]X coord, 0-319[5]Y coord, 0-319
The driver emits six event types in column [0]:
csi.PIX_OFF_EVENT— a pixel detected a brightness decrease (theDIFF_OFFcomparator threshold was crossed). X/Y point to the pixel that fired.csi.PIX_ON_EVENT— a pixel detected a brightness increase (theDIFF_ONthreshold was crossed). X/Y point to the pixel.csi.EXT_TRIGGER_FALLING— the sensor’s external trigger pin saw a falling edge. X/Y are unused.csi.EXT_TRIGGER_RISING— the sensor’s external trigger pin saw a rising edge. X/Y are unused.csi.RST_TRIGGER_FALLING— pixel-reset trigger, falling edge. X/Y are unused. Not generated by the firmware at this time.csi.RST_TRIGGER_RISING— pixel-reset trigger, rising edge. X/Y are unused. Not generated by the firmware at this time.
The GENX320’s external trigger input is wired to the camera’s
frame-sync line, which is also routed to P10 on both the
processor and the pin header — drive P10 to inject sync edges
into the event stream and pick them up as EXT_TRIGGER_RISING /
EXT_TRIGGER_FALLING events alongside the pixel data.
Most applications only care about PIX_OFF_EVENT and
PIX_ON_EVENT; the trigger types let you correlate events with
external timing signals.
Allocate the event buffer with shape (EVT_res, 6) where
EVT_res is a power of two between 1024 and 65536, then enter
event mode through csi.IOCTL_GENX320_SET_MODE with
csi.GENX320_MODE_EVENT and the buffer size. Read events with
csi.IOCTL_GENX320_READ_EVENTS, which fills the buffer up to its
capacity and returns the number of valid rows.
Image.draw_event_histogram rasterizes events into a grayscale
image — for each ON event it adds contrast to the bin; for
each OFF event it subtracts. clear=True resets the image to
brightness first; clear=False accumulates over many calls:
import csi
import image
import time
from ulab import numpy as np

img = image.Image(320, 320, image.GRAYSCALE)
events = np.zeros((2048, 6), dtype=np.uint16)

csi0 = csi.CSI(cid=csi.GENX320)
csi0.reset()
csi0.ioctl(csi.IOCTL_GENX320_SET_MODE, csi.GENX320_MODE_EVENT, events.shape[0])

clock = time.clock()
while True:
    clock.tick()
    n = csi0.ioctl(csi.IOCTL_GENX320_READ_EVENTS, events)
    img.draw_event_histogram(events[:n], clear=True, brightness=128, contrast=64)
    img.flush()
    print(n, clock.fps())
The histogram-mode bias presets, AFK filter, and hot-pixel
calibration ioctls all work the same way in event mode — call
them after csi.IOCTL_GENX320_SET_MODE.
Filtering by polarity
Slice the events array with ulab to keep only ON events (motion into a brighter state) or only OFF events:
TARGET = csi.PIX_ON_EVENT  # or csi.PIX_OFF_EVENT

events_slice = events[:n]
indices = np.nonzero(events_slice[:, 0] == TARGET)[0]
if len(indices):
    target_events = np.take(events_slice, indices, axis=0)
    img.draw_event_histogram(target_events, clear=True,
                             brightness=128, contrast=64)
Long-exposure accumulation
Set clear=False to keep stacking events into the same image
over many frames — the result is a motion-trail visualization.
Reset periodically to start a new exposure:
EXPOSURE_FRAMES = 30
i = 0
while True:
    n = csi0.ioctl(csi.IOCTL_GENX320_READ_EVENTS, events)
    clear = (i % EXPOSURE_FRAMES) == 0
    img.draw_event_histogram(events[:n], clear=clear, brightness=128, contrast=64)
    img.flush()
    i += 1
High-speed processing
Drop the visualization to free CPU for event processing. Print stats every Nth iteration only — pushing a print line on every iteration becomes the bottleneck at high event rates:
csi0 = csi.CSI(cid=csi.GENX320)
csi0.reset()
csi0.ioctl(csi.IOCTL_GENX320_SET_MODE, csi.GENX320_MODE_EVENT, events.shape[0])

clock = time.clock()
i = 0
while True:
    clock.tick()
    n = csi0.ioctl(csi.IOCTL_GENX320_READ_EVENTS, events)
    i += 1
    if not i % 10:
        print(f"{n} events  {clock.fps()} fps")
Spatio-temporal contrast (STC) filter
A real moving contrast edge tends to trigger a noisy burst of events on the same pixel within a short time window — pixel mismatch and analog noise produce extra events around the genuine transition that aren’t useful to the application. The STC filter is an on-chip post-process that keeps only one (or a few) events per burst and drops the rest.
It implements three strategies, selected via
csi.IOCTL_GENX320_SET_STC and a GENX320_STC_* constant.
Each mode is defined by which events it forwards from a burst:
Mode |
Keeps |
Drops |
|---|---|---|
every event |
nothing |
|
second event of a burst |
first + later events |
|
first event of a burst |
subsequent events |
|
first + subsequent edges |
redundant noise only |
In detail:
csi.GENX320_STC_DISABLE— filter off, every event passes through (default).csi.GENX320_STC_ONLY— keeps the second event of a burst. Parameter:stc_threshold(ms). If a new event on a pixel arrives withinstc_thresholdof a prior event, it’s considered the “second” of a burst and is forwarded — the first event and any subsequent events in the same burst are filtered out. Best when you want a noise-confirmed transition rather than the very first hit.csi.GENX320_STC_TRAIL_ONLY— keeps the first event of a burst. Parameter:trail_threshold(ms). After a pixel fires, subsequent events on the same pixel are dropped untiltrail_thresholdhas elapsed. Preserves the precise timing of the leading edge — useful when the polarity-switch moment matters more than burst confirmation.csi.GENX320_STC_TRAIL— combines both. Parameters:stc_thresholdandtrail_threshold(both ms). Keeps the leading edge per Trail mode plus subsequent edges per STC mode, so multiple events from a burst still get through — higher event throughput than the single-mode filters but the richest signal.
The two thresholds must stay within roughly a 13:1 ratio — the sensor rejects configurations where one is more than ~13x the other:
csi0.ioctl(csi.IOCTL_GENX320_SET_STC, csi.GENX320_STC_TRAIL, 1, 2)
csi0.ioctl(csi.IOCTL_GENX320_SET_STC, csi.GENX320_STC_DISABLE)
Buffer depth
When event rates spike, the default triple-buffer pipeline favours
the latest frame and discards old ones. Bump the FIFO depth via
csi.CSI.framebuffers to queue events instead — at the cost of
processing slightly older data when the host falls behind:
csi0.framebuffers(10) # FIFO depth, > 3 enables queueing
Desktop streaming and visualization
For real-time GUI visualization on a host PC, the
GenX320 Event Streaming tool
in the openmv-projects repo pairs the cam with a DearPyGui
front-end. The PC GUI runs two visualizations side by side: an
event accumulation canvas (same idea as Image.draw_event_histogram
but with selectable palettes and sliding-window vs. auto-clear
modes) and a per-pixel frequency map driven by an IIR band-pass
filter — useful for spotting periodic signals (rotating fans,
blinking LEDs, etc.) directly in the event stream.
It ships two on-cam streaming scripts:
Processed mode (
genx320_event_mode_streaming_on_cam.py) — the cam decodes events withcsi.IOCTL_GENX320_READ_EVENTSand streams each row as 12 bytes over USB ([0]type,[1]sec,[2]ms,[3]us,[4]x,[5]y). Easy to consume on the PC because the wire format matches the on-cam ndarray format.Raw mode (
genx320_raw_event_mode_streaming_on_cam.py) — the cam streams the chip’s native 32-bit packed event words throughcsi.IOCTL_GENX320_READ_EVENTS_RAW. That’s 4 bytes per event versus 12 in processed mode (about 3x less data over USB), so ~3x higher achievable event rate when the link is the bottleneck. The PC decodes the packed words back to the same 6-column event layout using vectorized numpy, so the downstream visualizer code is identical.
Raw mode is the default in the GUI because USB throughput is the binding constraint at the rates the GenX320 can produce; switch to processed mode if you need to plug processing logic into the on-cam script.