13.7.2. Uploading camera footage
A model performs best on the kind of images it was trained on, so the dataset should come from the camera that will run it – same sensor, same lens, same framing. The easiest way to gather a lot of those images quickly is to record a short video on the camera and let Roboflow break it into frames.
Record a clip of the target object – move it around, change the angle and distance, vary the background and lighting – and save it off the camera. On the project’s Upload Data page, drop the video file in.
13.7.2.1. Sampling the video into frames
Roboflow asks how often to sample the video into still images. The slider trades quantity against redundancy: too fast and consecutive frames are near-duplicates that pad the dataset without teaching the model anything new; too slow and you miss poses. One frame every second or two is a reasonable starting point – a half-minute clip becomes a few hundred varied images.
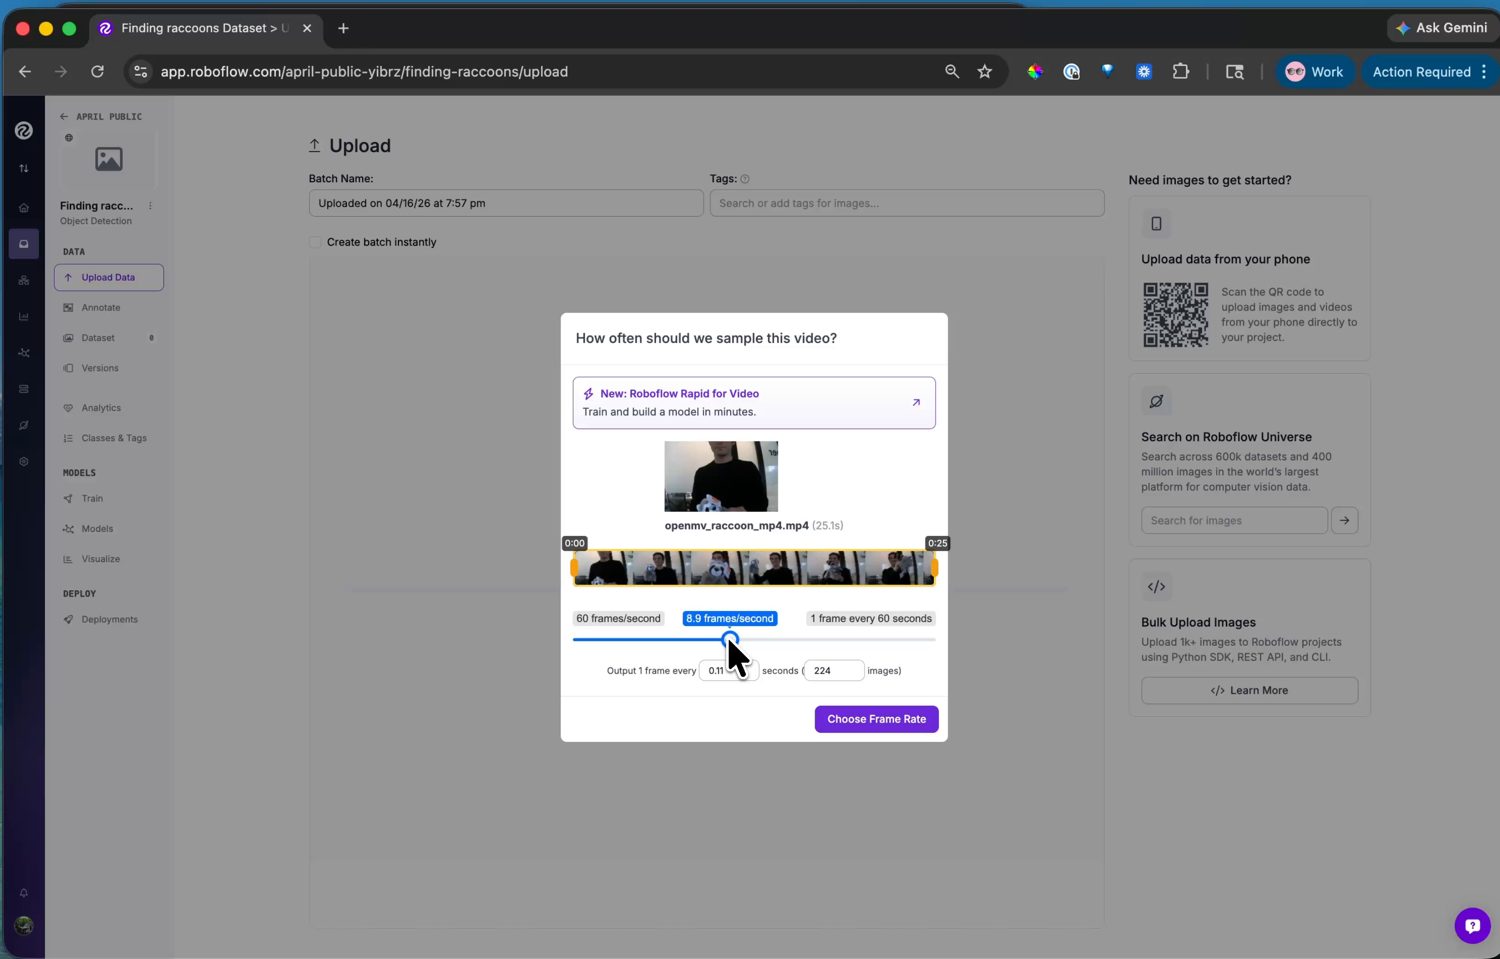
Choosing the sampling rate – the readout shows how many images the clip will produce.
Pick a rate and Roboflow extracts the frames and adds them to the project as unlabelled images.
Note
You don’t need an SD card to record the clip. The IDE’s Record button captures the camera’s live video straight to a file on your computer – run a plain capture script, record the clip, and upload that file to Roboflow.